
Varroa mites are a significant threat to bee colonies worldwide, causing devastating effects on bee populations and honey production. Preventing and treating for varroa effectively is crucial for beekeepers and the ecosystem as a whole. In this comprehensive guide, we’ll explore proven strategies to combat varroa mites and keep your bee colonies thriving.
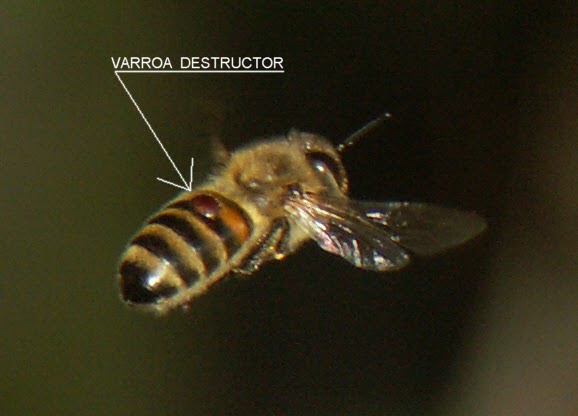
Before diving into treatment options, it’s important to have a solid understanding of varroa mites. These parasitic mites attach themselves to honeybees, feeding on their hemolymph and weakening the bee’s immune system. Left untreated, varroa mite infestations can lead to colony collapse.
Varroa mites (Varroa destructor) became a significant issue for beekeepers and honeybee populations starting in the early 20th century. They were first discovered in Southeast Asia in the 1900s, where they are believed to have co-evolved with the Asian honeybee (Apis cerana) without causing significant harm.
However, in the 1950s and 1960s, the varroa mites jumped hosts to the Western honeybee (Apis mellifera) through natural migration or possibly due to human transportation of infected hives. This transition had severe consequences because the Western honeybee had not evolved alongside the mites and therefore lacked natural defenses against them.
The introduction of varroa mites to honeybee populations outside of their native range led to widespread infestations, colony losses, and substantial economic losses for beekeepers. Since then, varroa mites have become one of the most serious threats to beekeeping worldwide, contributing to declines in bee populations and posing significant challenges for the beekeeping industry. Efforts to manage and control varroa mites continue to be a critical focus for beekeepers and researchers.
Integrated Pest Management (IPM) Approach
Integrated Pest Management (IPM) for honeybees is a holistic and sustainable approach to managing pests, diseases, and stressors that affect bee colonies. It combines various strategies to minimize the impact of these challenges while safeguarding the overall health and well-being of your honey bee colony and the environment.
Key components of IPM for honeybees include:
Resistant Breeding
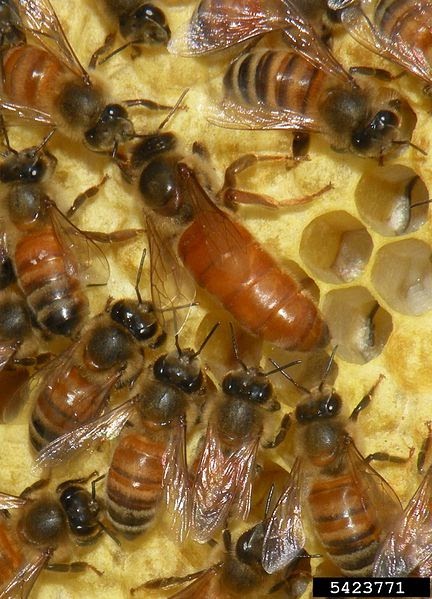
This is a long-term strategy that aims to strengthen the overall health and resilience of your colonies. Look for queens from reputable breeders with varroa-resistant genetics. Selectively breed queen bees with traits that make them more resistant to pests, diseases, or environmental stressors.
Here are some key characteristics and behaviors that indicate resistance and resilience in queen bees:
Grooming Behavior
Resistant queen bees exhibit enhanced grooming behavior. This trait enables them to remove varroa mites from themselves and other bees, reducing mite infestations.
Hygienic Behavior
Queens with hygienic traits lay eggs in cells that are more readily recognized and removed if they become infested with mites or diseased brood.
Virus Tolerance
Some queen bees show a higher tolerance or resistance to specific viruses commonly found in bee colonies, such as deformed wing virus (DWV) and Israeli acute paralysis virus (IAPV).
Nosema Resistance
Certain queen bees may exhibit resistance to Nosema, a fungal gut pathogen.
Consistent Egg Laying
Healthy queens consistently lay a large number of eggs, ensuring a strong and productive colony.
Brood Pattern Quality
A well-defined and consistent brood pattern with minimal gaps or irregularities indicates a queen’s vitality.
Calm and Docile Nature
Queens that are calm and easy to work with may experience less stress, which can contribute to overall colony health.
Strong Pheromone Production
A queen with a robust pheromone profile can help maintain colony cohesion and organization.
Diverse Gene Pool
A queen with a diverse genetic background is more likely to produce offspring with a broader range of immune responses, potentially enhancing resistance to diseases.
Climate Resilience
Queens that are well-adapted to the local climate and environmental conditions are more likely to thrive and lead healthy colonies.
Mating with Varroa-Sensitive Hygienic (VSH) Drones
Queens that mate with drones exhibiting varroa-sensitive hygienic behavior can pass on traits that enhance varroa mite resistance.

Cultural Practices
Employ good beekeeping practices, such as providing a balanced diet, maintaining proper hive ventilation, ensuring clean water sources, and managing hive placement to reduce stressors on the colony. Allowing a natural break in brood production during periods of dearth can disrupt the mite’s reproduction cycle.
Regular Monitoring
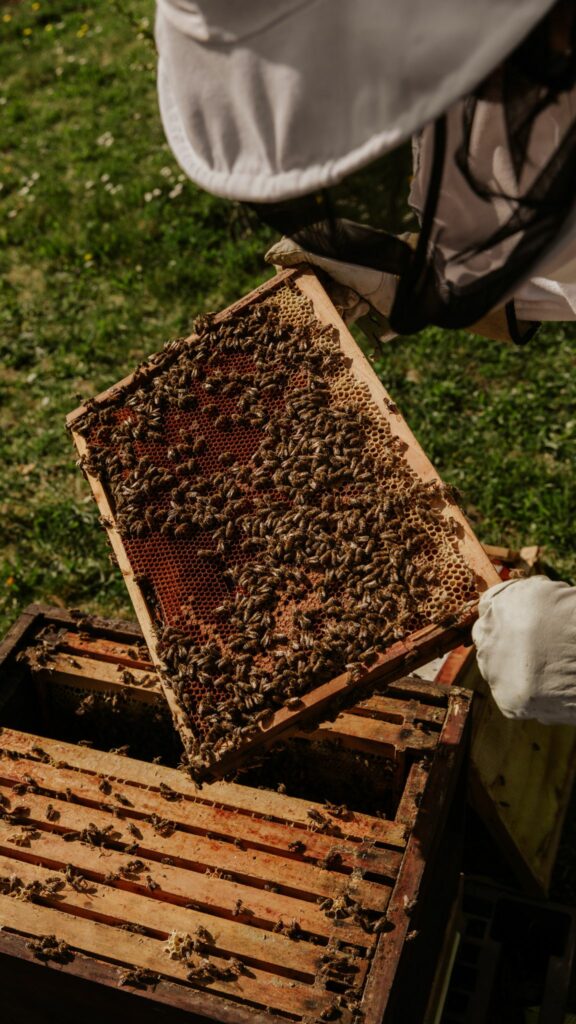
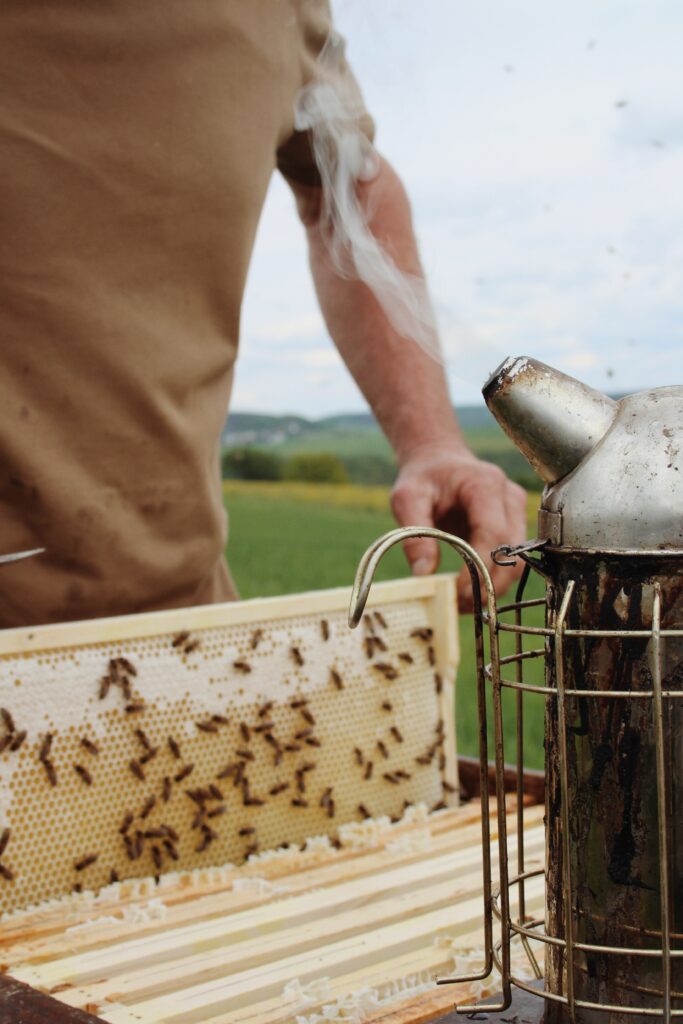
Regularly inspect your hives for signs of varroa mite infestations. Sticky boards, alcohol washes, and drone brood removal can be effective monitoring techniques. The Varroa Management Decision Tool created by the Honey Bee Health Coalition is a great resource to help you make informed hive-management decisions. Let’s go into more detail on a couple methods…
Sticky Boards
Sticky boards are a useful tool in beekeeping for monitoring and managing pest populations in your beehive, particularly for pests like varroa mites. Here’s a step-by-step guide on how to use sticky boards effectively:
Materials Needed
– Sticky board (usually made of corrugated cardboard or plastic with a sticky adhesive surface)
– A tray or drawer that fits under your beehive’s screened bottom board (or a designated area for placing the sticky board)
–Powdered Sugar
– A marker or pen
– A brush or spatula (optional, for removing debris from the sticky surface)

Sticky Board Photo Courtesy of Mann Lake
Steps
1. Choose the Right Time
The ideal time to use a sticky board for monitoring is during the brood-rearing season, as this is when varroa mite populations tend to be highest. However, you can use sticky boards year-round to monitor other pests or assess overall hive health.
2. Prepare Your Hive
– Ensure your hive has a screened bottom board or a designated area where you can place the sticky board beneath the hive.
– Remove the existing bottom board or drawer, if applicable.
3. Place the Sticky Board
– If your sticky board has a protective covering, remove it to expose the adhesive surface.
– Slide the sticky board under the hive so that it covers the entire area of the screened bottom board or designated space.
4. Secure the Hive
– Replace the hive’s bottom board or drawer if you removed it earlier.
– Make sure the hive is securely closed to prevent drafts or unauthorized access.
5. Coat bees with powdered sugar
-The sugar encourages grooming behavior, dislodging some varroa mites in the process.
 You can also check mite levels using the Sugar Shake Method instead of an alcohol wash, but experts agree an alcohol wash is more accurate. Photo by Jurg Vollmer.
6. Wait for Monitoring Period
– Leave the sticky board in place for a designated period, typically 24-72 hours. The timing may vary based on your specific monitoring goals.
7. Remove the Sticky Board
– After the monitoring period, carefully slide the sticky board out from under the hive.
– Inspect the sticky surface for pests, including varroa mites, small hive beetles, or any other unwanted visitors.
– Use a brush or spatula to remove debris or bee carcasses from the sticky surface if necessary.
8. Record Your Findings
– Count and record the number of pests you find on the sticky board.
– Keep a record of monitoring data to track pest populations over time and make informed management decisions.
9.Take Action (if necessary)
– If the pest population exceeds recommended thresholds, consider implementing appropriate pest management strategies.
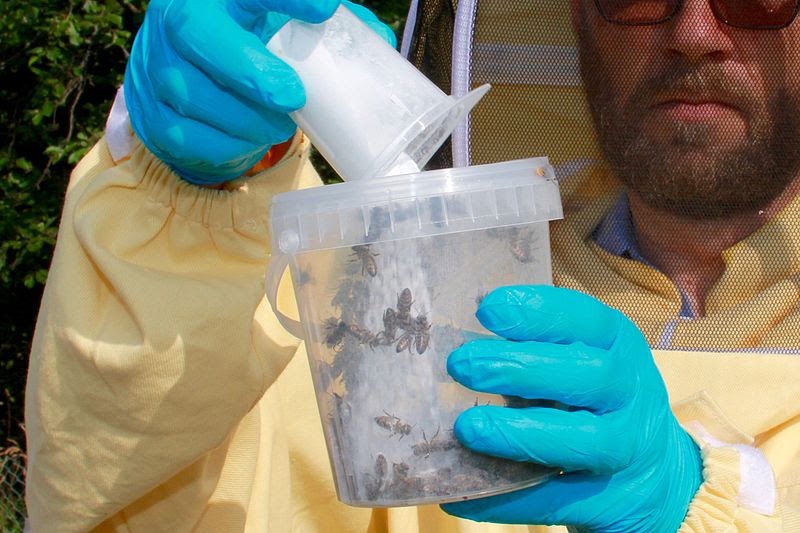
Alcohol Wash
Conducting an alcohol wash is an effective method for monitoring varroa mite infestations in a bee colony. Here’s a step-by-step guide on how to perform an alcohol wash:
Materials Needed
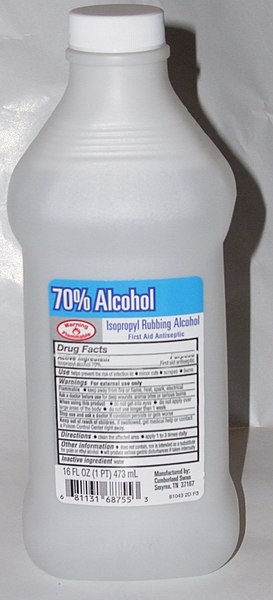
– 1/2 cup of rubbing alcohol (at least 70% isopropyl)
– A wide-mouthed container with a lid (large enough to hold a sample of bees)
– A screened bottom board or a designated area for collecting bees
– A mason jar or similar container with a fine mesh screen or strainer
– A white surface, like a plastic plate or tray, for counting mites
Steps
1. Choose the Right Time
– Select a time when a significant number of adult bees are present in the hive, typically during a warm and sunny day.
2. Prepare the Alcohol Solution
– Pour 1/2 cup of rubbing alcohol into the wide-mouthed container. Make sure it has a secure lid.
3. Collect the Sample
– Use a bee brush or similar tool to gently brush about 300-400 adult worker bees from the frames into the wide-mouthed container with the rubbing alcohol. Aim to collect a representative sample from various frames in the brood nest.
4. Shake and Agitate
– Close the lid securely and gently shake or agitate the container for about 30 seconds. This helps dislodge the mites from the bees.
5. Filter the Solution
– Set up a mason jar or similar container with a fine mesh screen or strainer over the mouth. This will allow you to strain the alcohol and mites from the bee sample.

6. Pour and Filter
– Carefully pour the alcohol and bee mixture through the strainer into the mason jar. The alcohol will pass through the strainer, leaving the mites and debris behind.
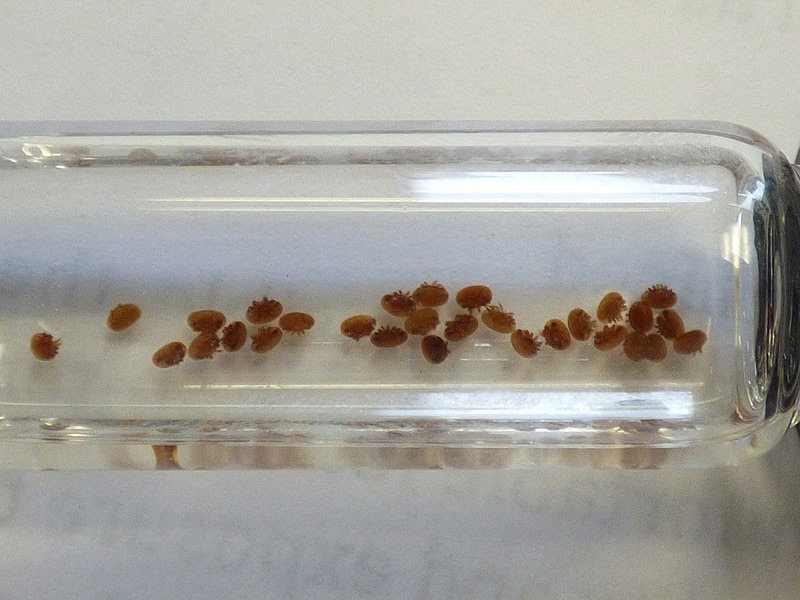
7. Count the Mites
– Pour the strained alcohol into a white tray or plate. The white surface makes it easier to spot the tiny varroa mites.
– Use a magnifying glass if needed to help identify and count the mites. Varroa mites are reddish-brown and oval-shaped.
8. Record Your Findings
– Count and record the number of mites you find. This will serve as a baseline for monitoring mite populations in your colony.
9. Dispose of the Bee Sample
– After conducting the alcohol wash, the bee sample may be stressed or deceased. You may choose to release them back into the hive or dispose of them responsibly.
10. Interpret Your Results
– Compare the number of mites you found to established threshold levels. This will help you determine if intervention is needed to manage the varroa mite population.
Drone Brood Removal
Removing drone brood is an effective method for controlling varroa mite populations in a bee colony, as varroa mites prefer to reproduce in drone brood cells. Here’s a step-by-step guide on how and when to remove drone brood to prevent varroa infestations:
Materials Needed
– Uncapping knife or uncapping fork (optional)
– Hive tool
– Container for collecting drone brood (e.g., plastic container with a lid)
– Screen or mesh for straining
Steps
1. Choose the Right Time
– The ideal time to remove drone brood for varroa control is during the early stages of drone development. This is typically when the drone larvae are capped but have not yet reached full maturity.
2. Inspect the Brood Frames
– Open the hive and carefully inspect the frames in the brood chamber. Look for frames with capped drone brood cells.
3. Select Frames for Removal
– Choose frames with a significant number of capped drone brood cells. It’s important to select frames strategically to have a meaningful impact on varroa mite populations.
4. Remove the Frame
– Gently use your hive tool to pry the selected frame from the hive, being careful not to damage the comb or disturb the bees excessively.
5. Inspect the Drone Brood
– Examine the capped drone brood for signs of varroa mite infestations. You may notice small reddish-brown mites on the drone pupae.
6. Uncap the Drone Brood (Optional)
– Using an uncapping knife or fork, carefully remove the caps from the drone brood cells. This step is optional but can help expose any mites that are hiding within the cells.
7. Collect the Drone Brood
– Shake or brush the drone brood off the frame into your collection container. Make sure the container has a lid to prevent the bees from robbing the brood.
8. Strain the Brood
– If desired, use a screen or mesh to strain out the varroa mites and any debris from the collected drone brood.
9. Dispose of the Brood
– You can choose to freeze, incinerate, or otherwise dispose of the drone brood to ensure any varroa mites are eliminated.
10. Replace the Frame
– After removing the drone brood, carefully return the frame to the hive, ensuring it’s properly positioned and spaced.
11. Monitor and Repeat
– Continue to monitor the colony for varroa mite levels and repeat the drone brood removal process, alcohol washes, or use sticky boards as needed throughout the season.
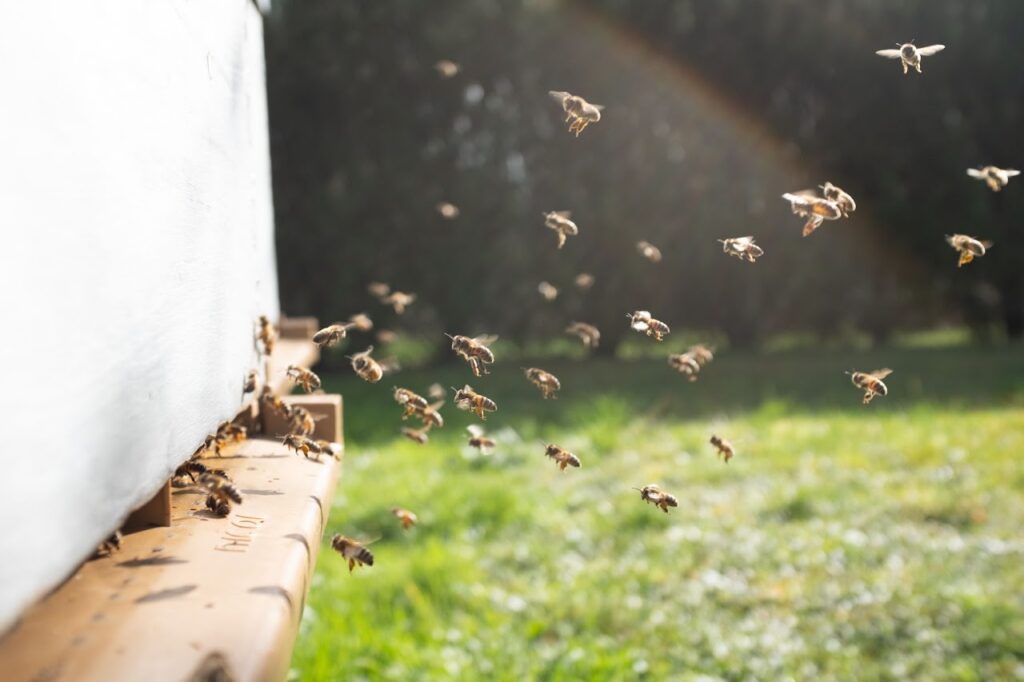 Healthy Hive Entrance Photo by Damien Tupinier
Threshold-based Treatment
Rather than applying treatments indiscriminately, IPM sets specific thresholds for pest levels. Only administer treatments when pest populations exceed these predetermined levels, indicating a potential threat to colony health.
Biological Controls
Beneficial organisms can be introduced into the hive environment to naturally combat pests and diseases. Predatory mites and beetles are natural enemies of varroa mites in bee colonies. They help control varroa mite populations by preying on or parasitizing the mites, thereby reducing their numbers. Here are two common types of predatory organisms used in varroa mite control:
Predatory Mites: Hypoaspis miles (formerly known as Stratiolaelaps scimitus): These small, soil-dwelling mites are effective predators of varroa mites. They consume varroa mite eggs and nymphs, helping to keep their populations in check. Hypoaspis miles are non-aggressive towards honeybees and do not pose any threat to the hive.
Predatory Beetles: Atheta coriaria (formerly Aleochara bilineata): These small, black beetles are known to be natural enemies of varroa mites. They are attracted to the scent of varroa-infested brood cells. Once inside the cell, they lay their eggs on the developing pupae. The beetle larvae then feed on the varroa mite pupae, effectively parasitizing them.
When using predatory organisms, it’s crucial to follow recommended guidelines and ensure that the introduced predators are compatible with the bee colony’s environment. Additionally, it’s important to monitor the effectiveness of these predators in reducing varroa mite populations and adjust your management strategies accordingly.
RNA interference (RNAi): Emerging biotechnological solutions like RNA interference show promise in disrupting varroa mite reproduction. RNAi is a natural cellular process that regulates gene expression by suppressing the activity of specific genes. It plays a crucial role in various biological processes, including development, immunity, and defense against viruses.
In the context of honey bees, RNA interference has been explored as a potential tool for controlling pests and pathogens, including varroa mites and certain viruses. By developing siRNA molecules that specifically target varroa mite genes, researchers aim to interfere with their ability to reproduce and survive within a bee colony.
While RNA interference holds promise as a tool for honey bee pest and pathogen control, there are challenges to overcome. These include the need for precise targeting to avoid unintended effects on non-target organisms and the development of efficient delivery methods for introducing siRNA into bee colonies.
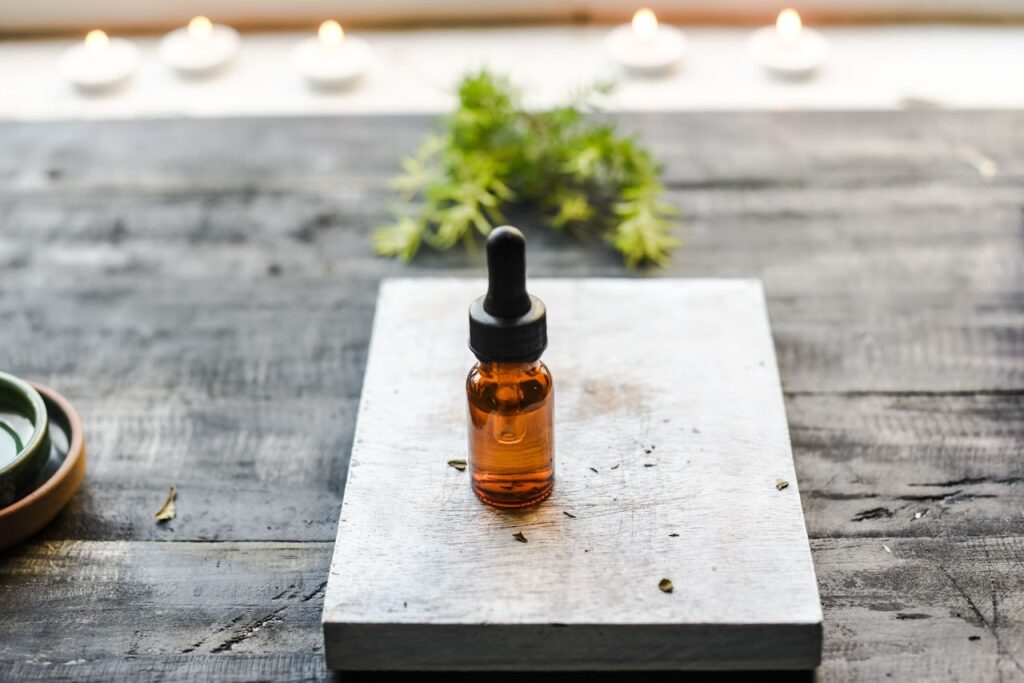 Photo by Anshu
Chemical Treatments (when necessary)
While chemical treatments are used judiciously, they should only be applied when other methods prove insufficient. Select treatments carefully and follow recommended guidelines to minimize any potential harm to the bees and the environment
Tea Tree and Spearmint Oil
Essential oils like tea tree and spearmint have shown potential in controlling varroa mites. They can be applied as part of an integrated treatment plan.
Thymol
Derived from thyme oil, thymol is an organic treatment option that can be used as a fumigant or in gel form.
Formic Acid
Formic acid is a naturally occurring compound that effectively controls varroa mites. Its application should be carried out following recommended guidelines.
Oxalic Acid
Oxalic acid is a widely used treatment option, especially during the broodless period. It’s crucial to follow safety instructions when using oxalic acid.
In conclusion, Integrated Pest Management is a vital approach for you to maintain thriving and healthy honey bee colonies. By combining regular monitoring, cultural practices, biological controls, and targeted chemical treatments, you can effectively manage pests while minimizing harm to their hives and the environment. Embracing IPM not only benefits bee colonies but also contributes to the sustainability of your beekeeping operations in the long run.
Protecting bee colonies from varroa mites is paramount for the sustainability of beekeeping and the health of our ecosystems. By employing a combination of integrated pest management techniques, chemical treatments, mechanical methods, biotechnological solutions, and natural remedies, beekeepers can effectively combat varroa mite infestations. Remember to always follow recommended guidelines and prioritize the well-being of your bee colonies. Together, we can contribute to the preservation of these vital pollinators.
Sign up for the Giggles and Gloves Newsletter below, then learn more about beekeeping by clicking here!